Templates
The Templates feature allows users to create and manage Requests, Documents, Subtasks and Community. The multi-tab screen makes managing these functionalities simpler.
Template Requests
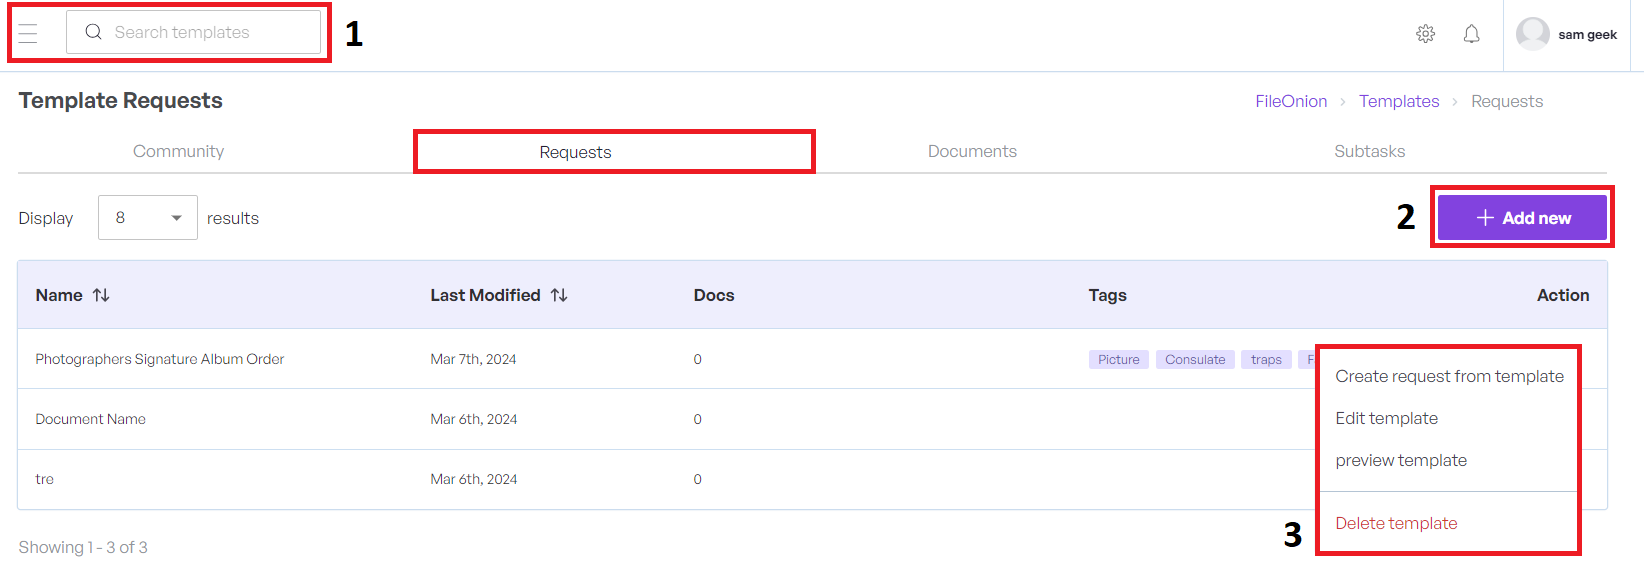
- Click the Search option we can search our Template Requests.
-
Click the Add New button to open a new screen and add a new request.
-
Click the three dots to open the context menu that allows Create request from template, Edit template, Preview template and Delete template option.
Please refer to New Request section.
Add New Template
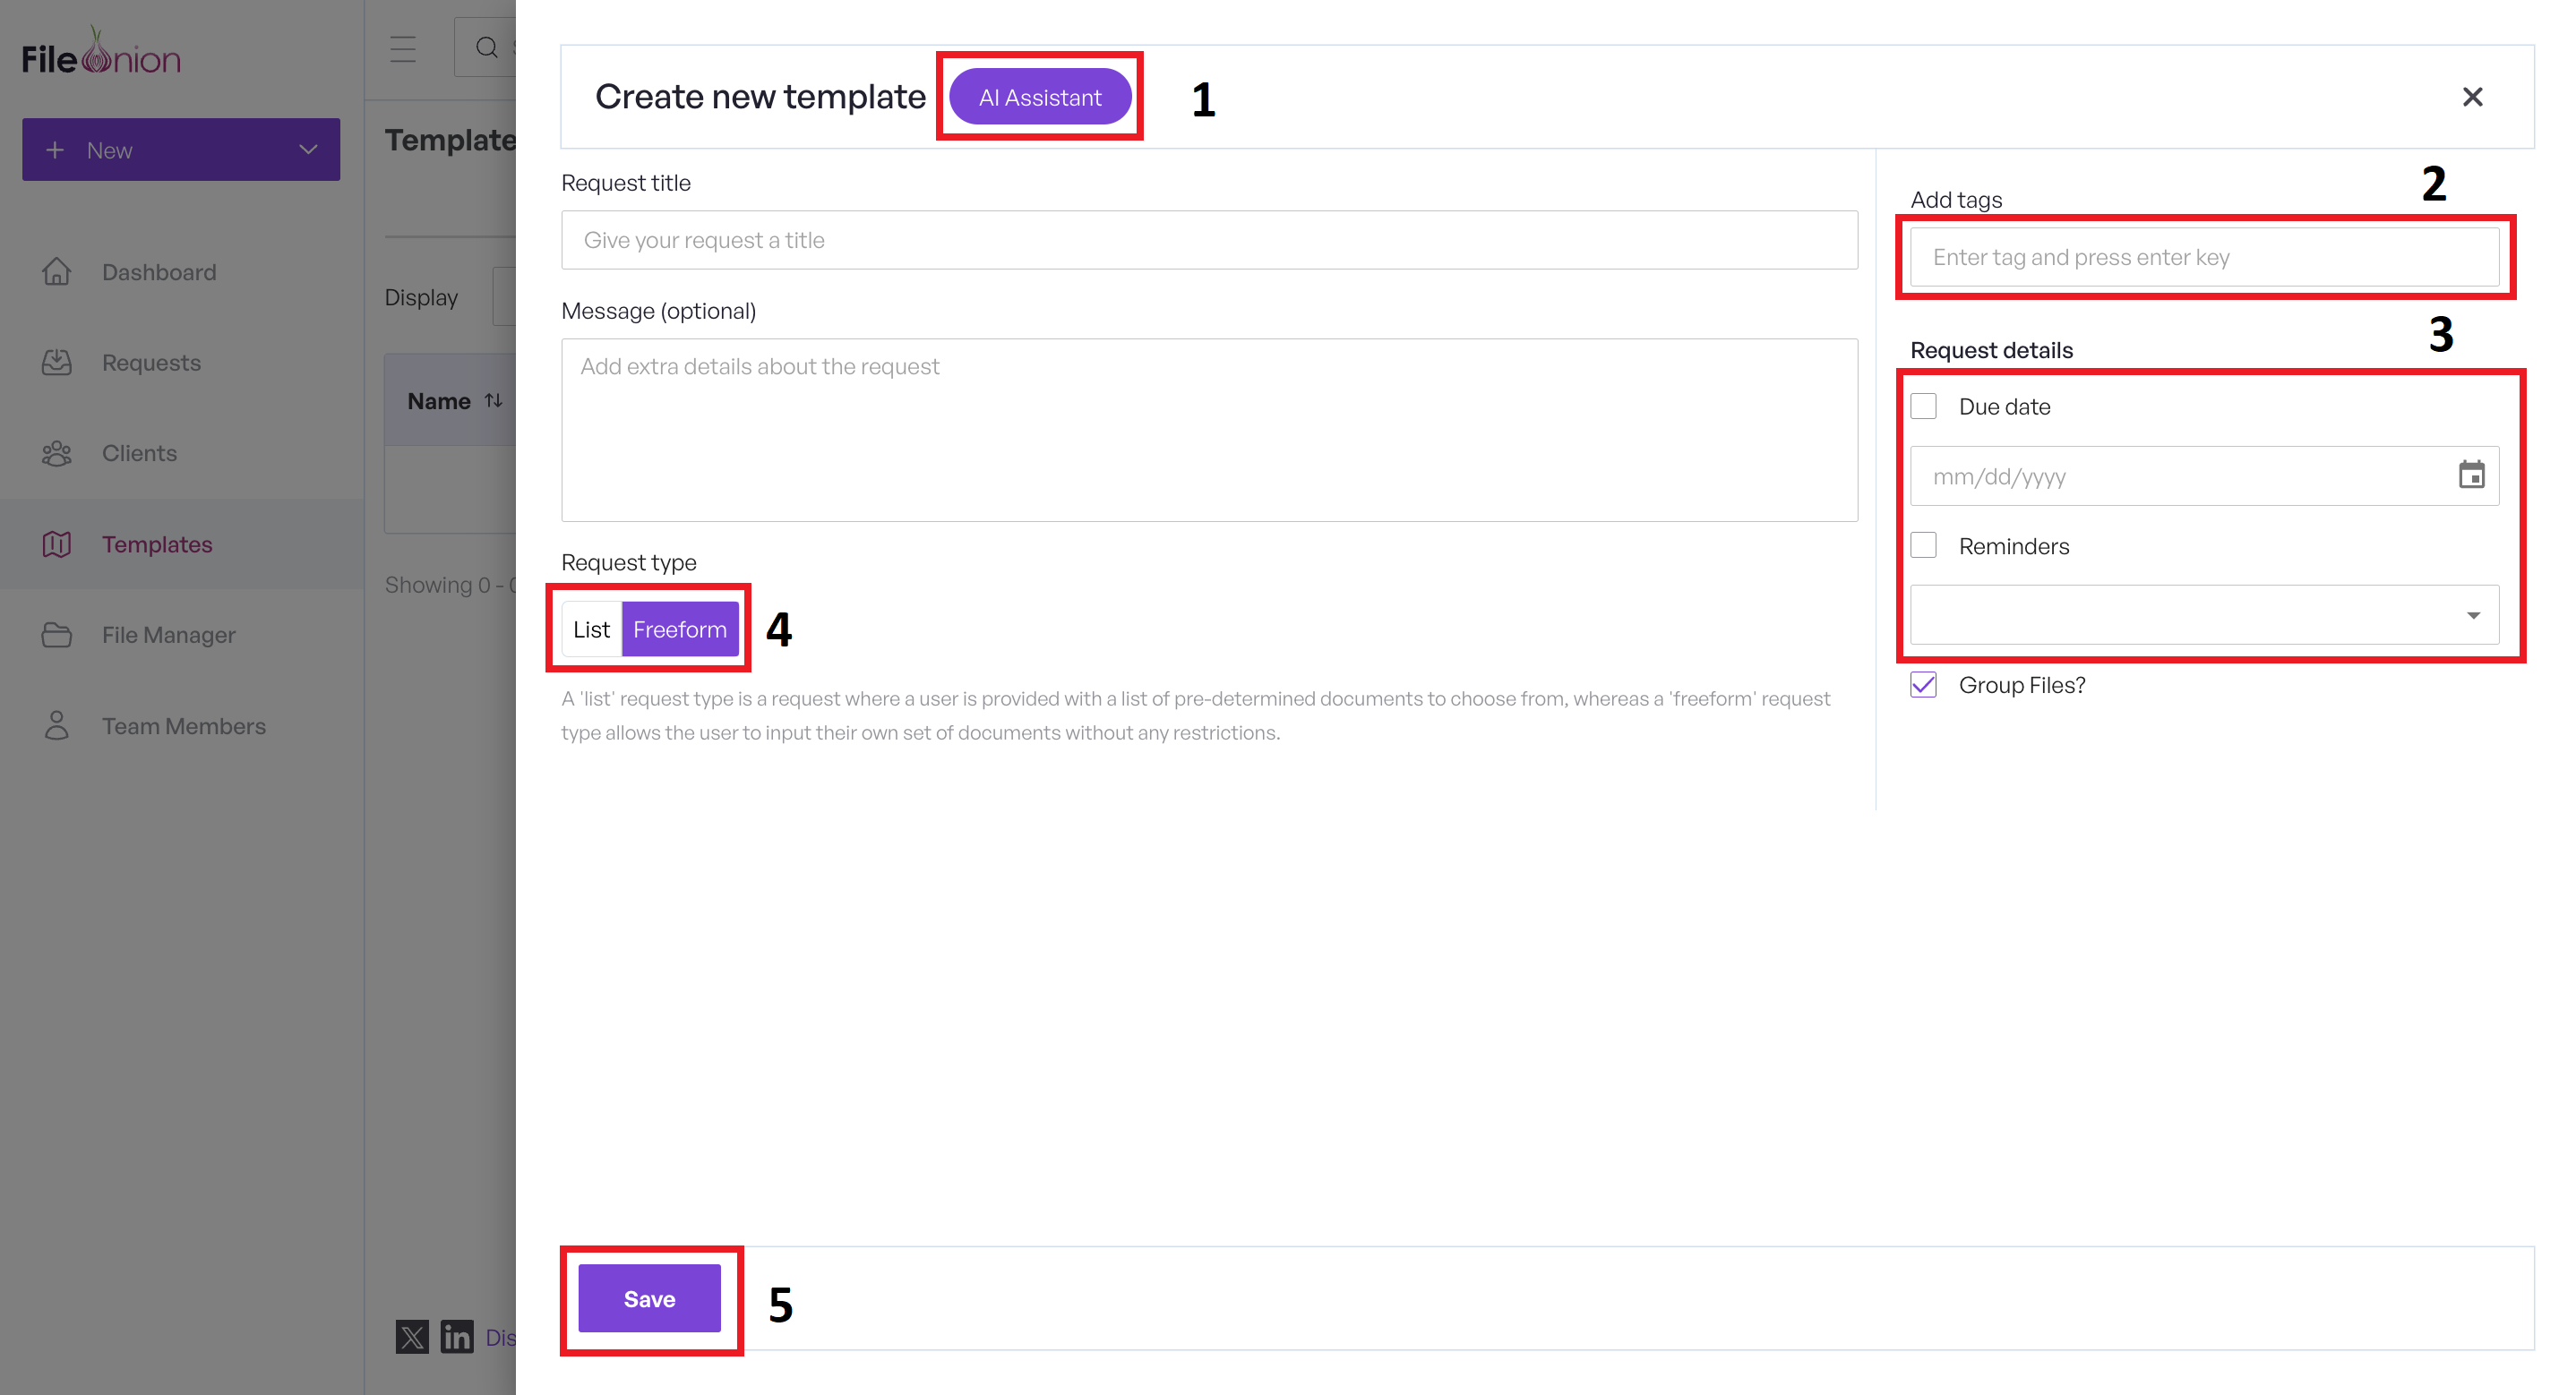
- Create a new template through the AI assistant.
- Add tags for your new template, pressing the Enter key after each one for seamless categorization.
- Select appropriate Due date and choose Reminder option from the dropdown.
-
Request Types are explained in detail in the following sections. Please refer to List - Request Type for more information.
- Click the Save button to save the request and close this screen.
Edit Template
Select the Edit Template option to load the selected request for editing. For reference, see the screen below.
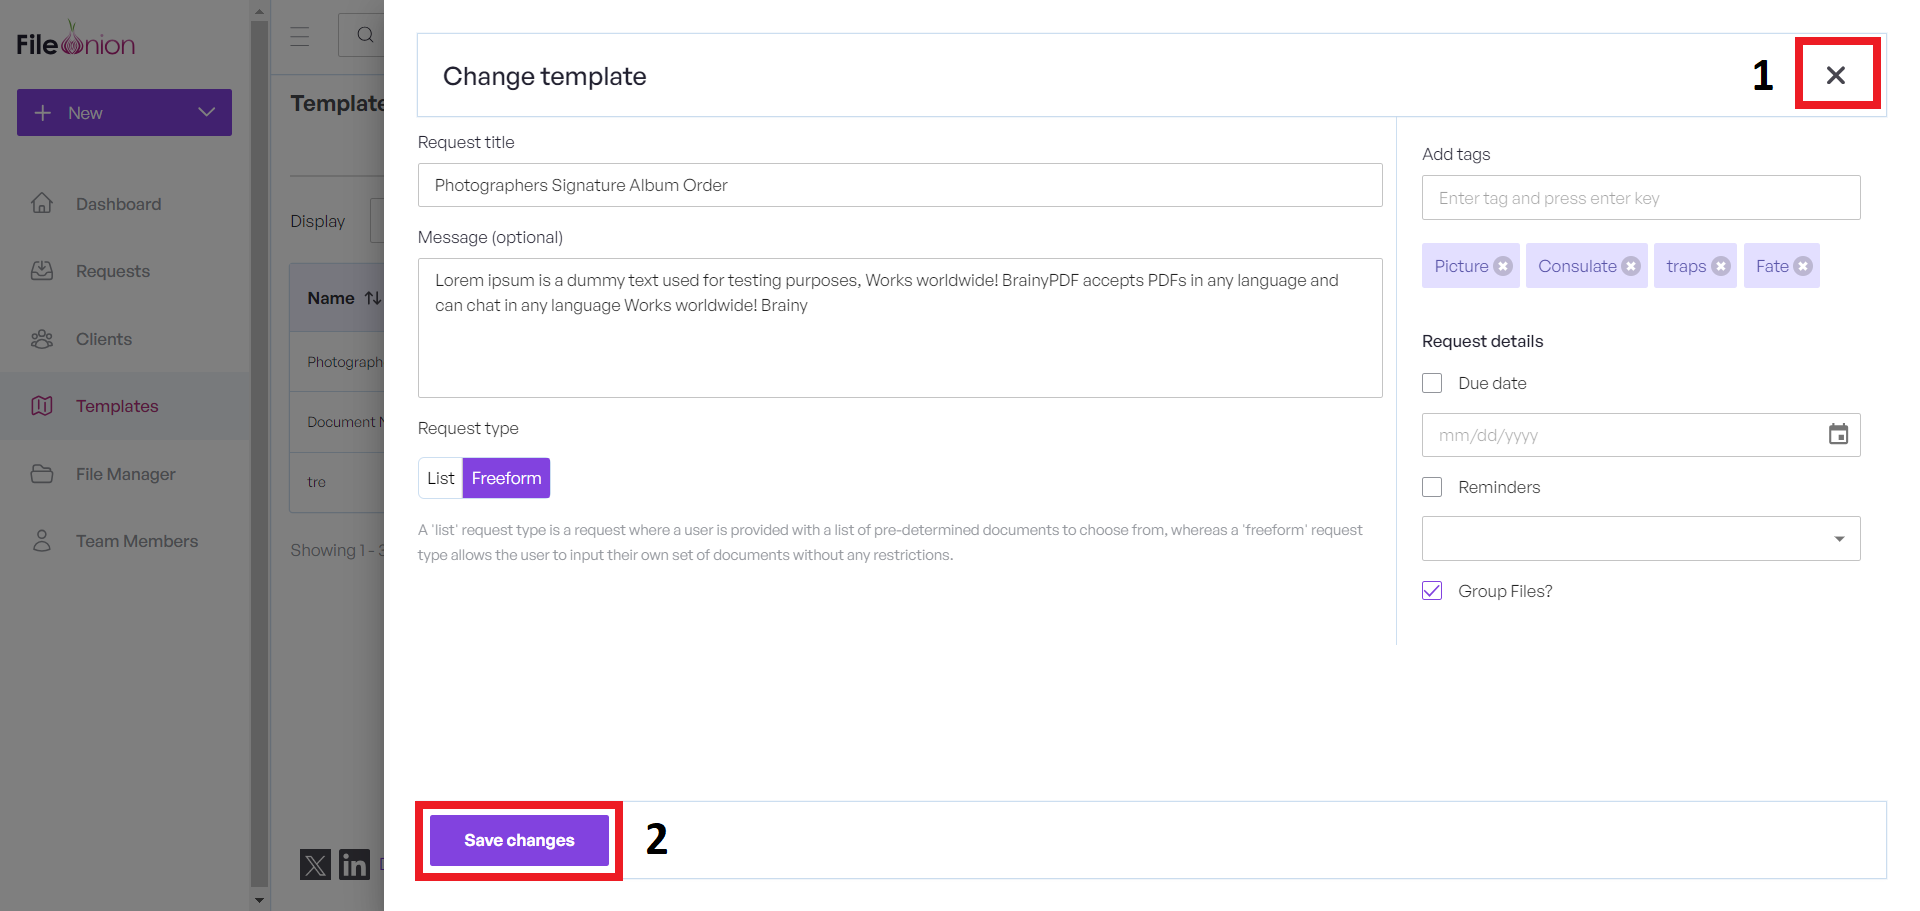
- To close without any changes, click the X button.
- Make necessary changes and click the Save changes button to save the changes.
Preview Template Request
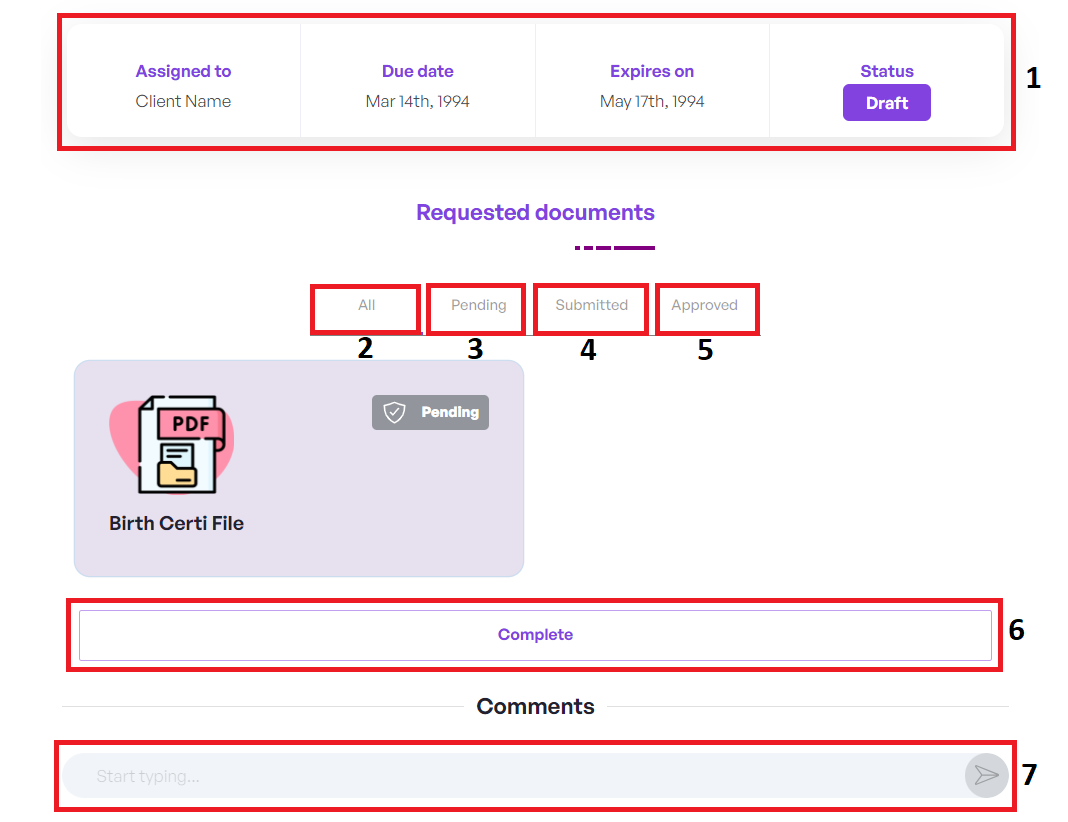
-
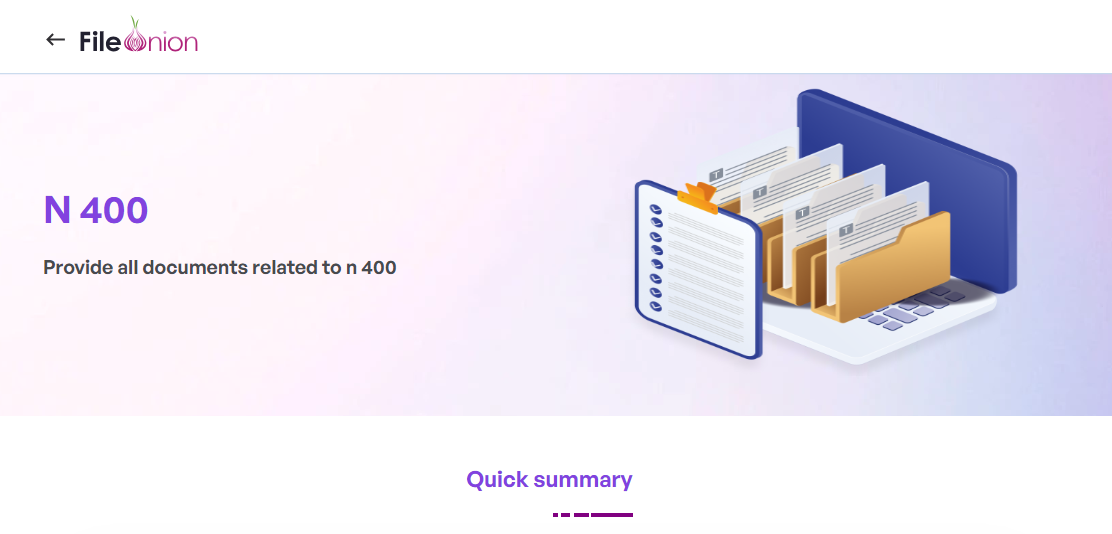
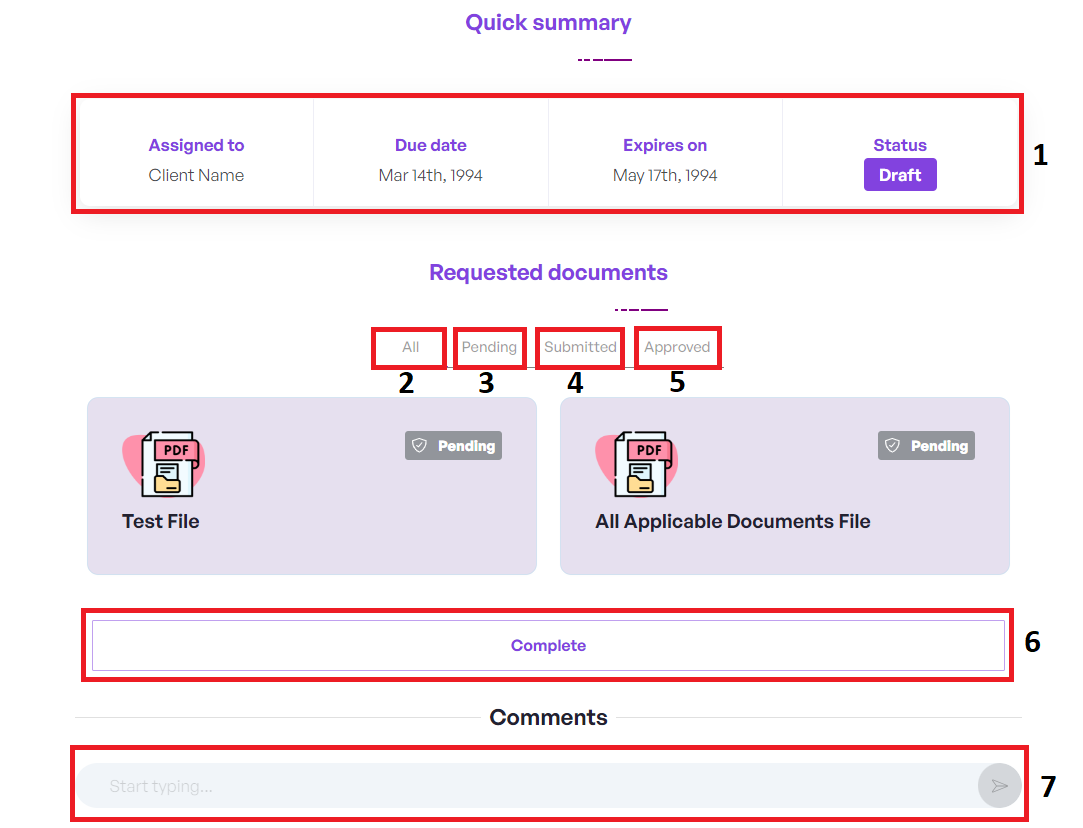
We have in Quick summary Assigned to, Due Date,Expires and Status.
-
ALL: Lists all requested documents.
- Pending: Documents awaiting submission or approval.
- Submitted: Documents already submitted for review.
- Approved: Documents successfully reviewed and accepted.
- Select this option to formally approve the document request once the user has satisfactorily completed the submission process.
- This section serves as a platform for comprehensive discussions, queries, or requests related to files or the project at hand.
Delete Template
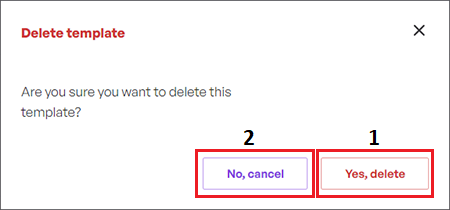
Select the appropriate template request record. From the context menu, choose Delete Template option to delete the selected request template.
- To delete, click the Yes, delete button.
- Click the No, Cancel button to close this screen without saving any change.
Subtask

- Click the Search option we can search our subtasks.
- Click the Add New button to open a new modal to add a new subtasks.
- Click the three dots to open the context menu that allows Edit subtasks and Delete subtasks option.
2.Add Subtask
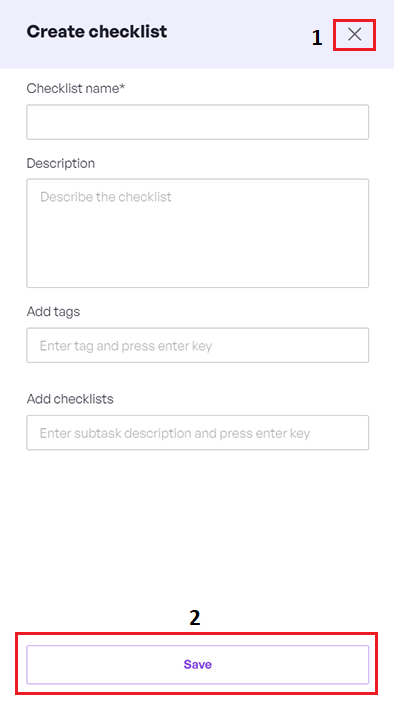
- Click X to close this screen without saving any changes.
- Click the Save button to save the subtask and close this screen.
Edit subtask
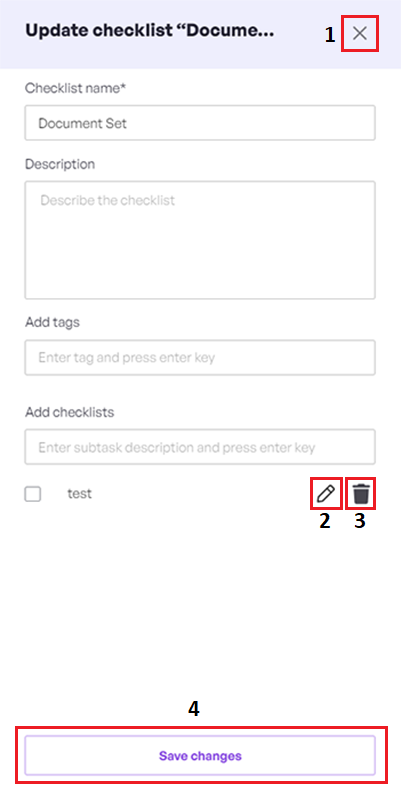
- Click X to close this screen without saving any changes.
- To update the checklists, Click the pencil icon.
- To delete the checklists ,Click the trash icon.
- Click the Save changes button to update the subtask and close this screen.
Delete Subtask
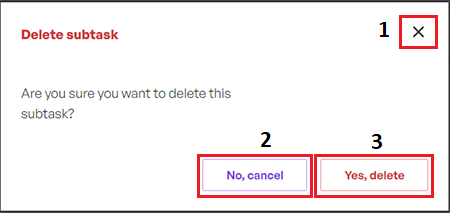
- Click X to revert to the previous screen.
- Click the No button to close this modal without saving any change.
- Click the Yes button to execute.
Documents

- Click the Search option we can search our Documents.
- Click the Add New button to open a new modal to add a new document.
- Click the three dots to open the context menu that allows Edit document and Delete document option.
2.Add Document
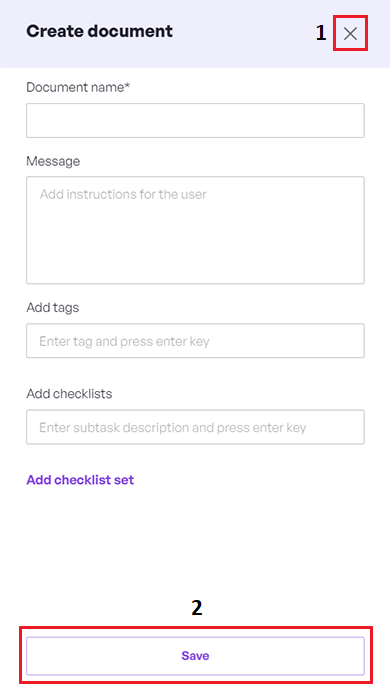
- Click X to close this screen without saving any changes.
- Click the Save button to save the document and close this screen.
Edit Document

- Click X to close this screen without saving any changes.
- Click the Add checklist set.
Please refer to select Subtask section.
- Click the Save changes button to update the Documents and close this screen.
Delete Document

- Click X to close this modal without saving any changes.
- Click the No button to close this modal without saving any changes.
- Click the Yes button to execute.
Community
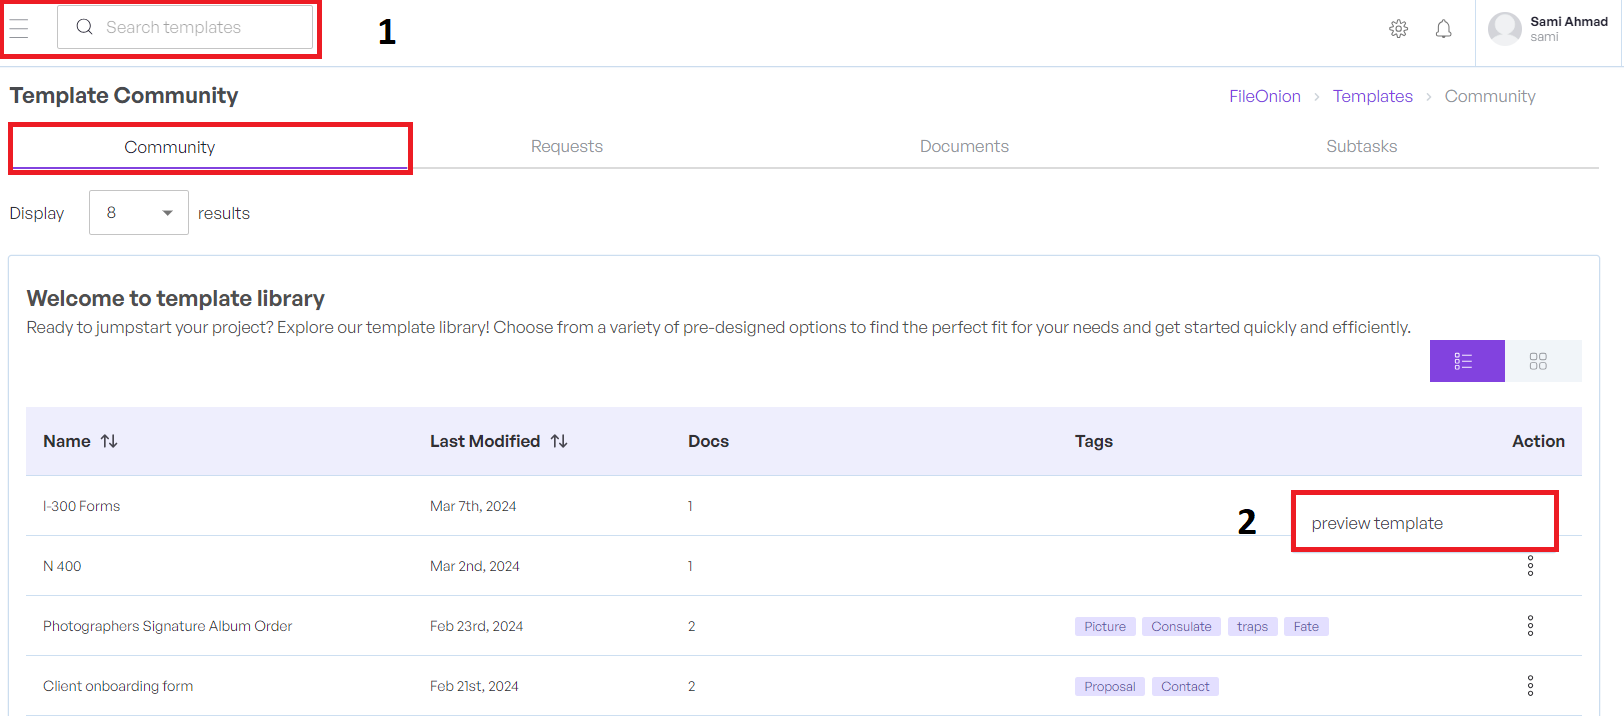
- Click the Search option we can search our community.
- Click the three dots to open the context menu that allows preview template.
Please refer to Preview Template section.
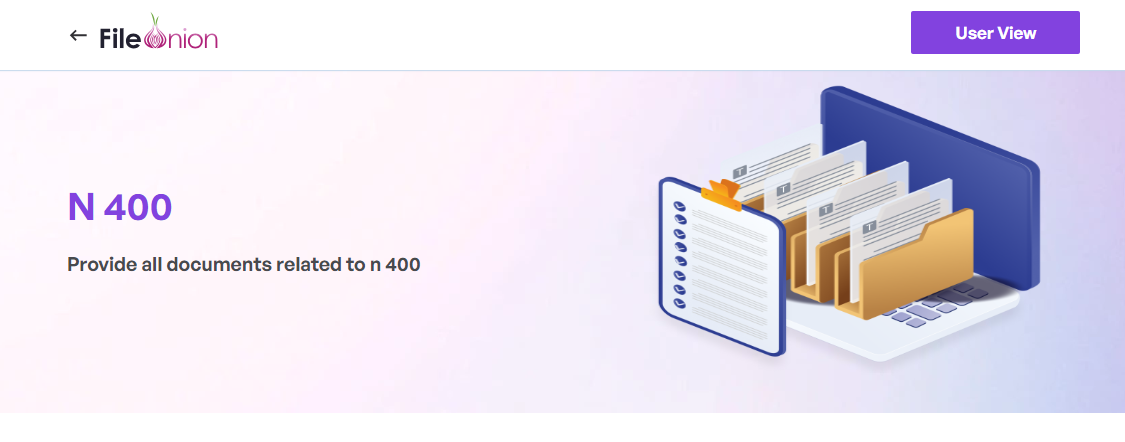
Preview Template Community
User View
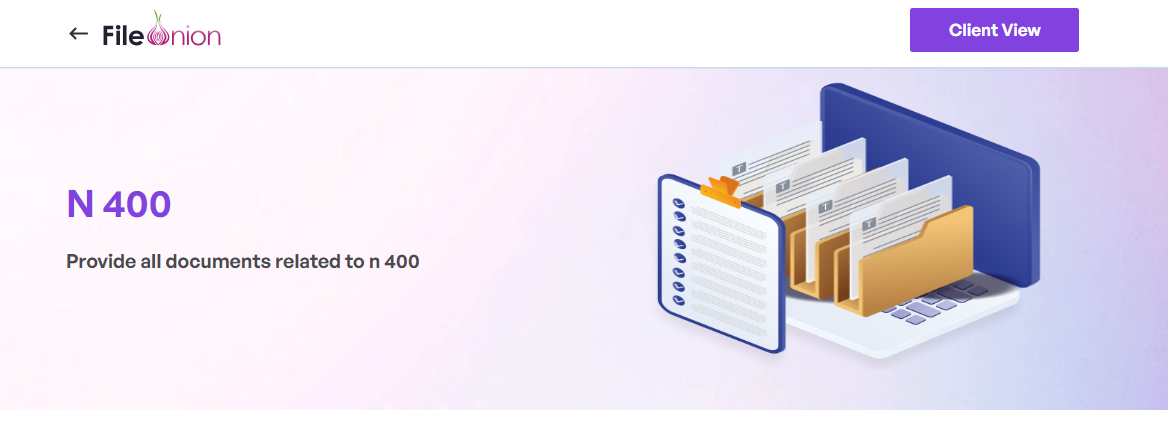
Click the User View button, it directs you to the Client view, where you can access a form.
-
We have in Quick summary Assigned to, Due Date,Expires and Status.
-
ALL: Lists all requested documents.
- Pending: Documents awaiting submission or approval.
- Submitted: Documents already submitted for review.
- Approved: Documents successfully reviewed and accepted.
- Select this option to formally approve the document request once the user has satisfactorily completed the submission process.
- This section serves as a platform for comprehensive discussions, queries, or requests related to files or the project at hand.
Client View
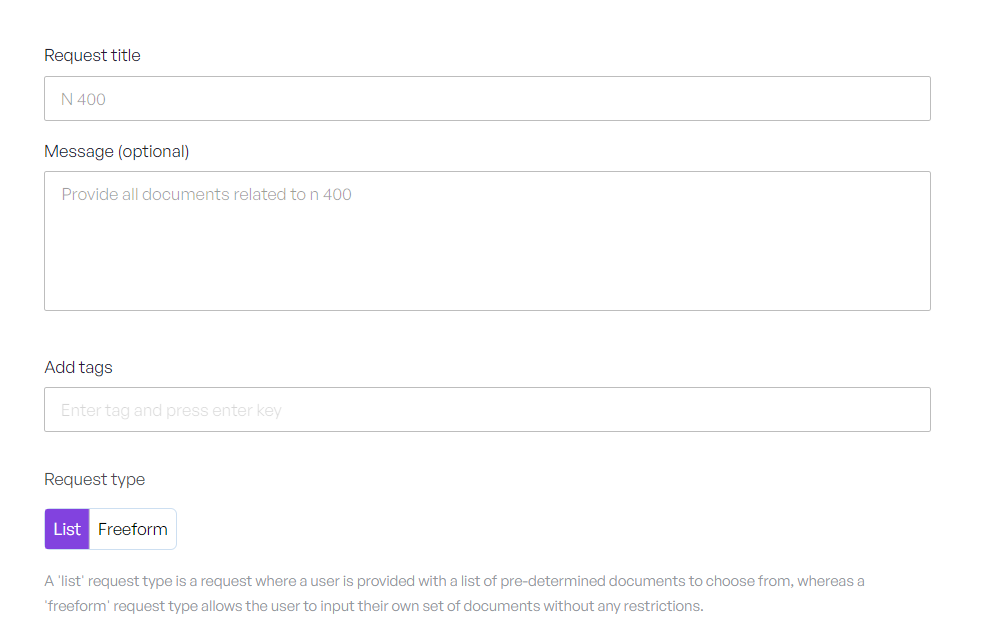
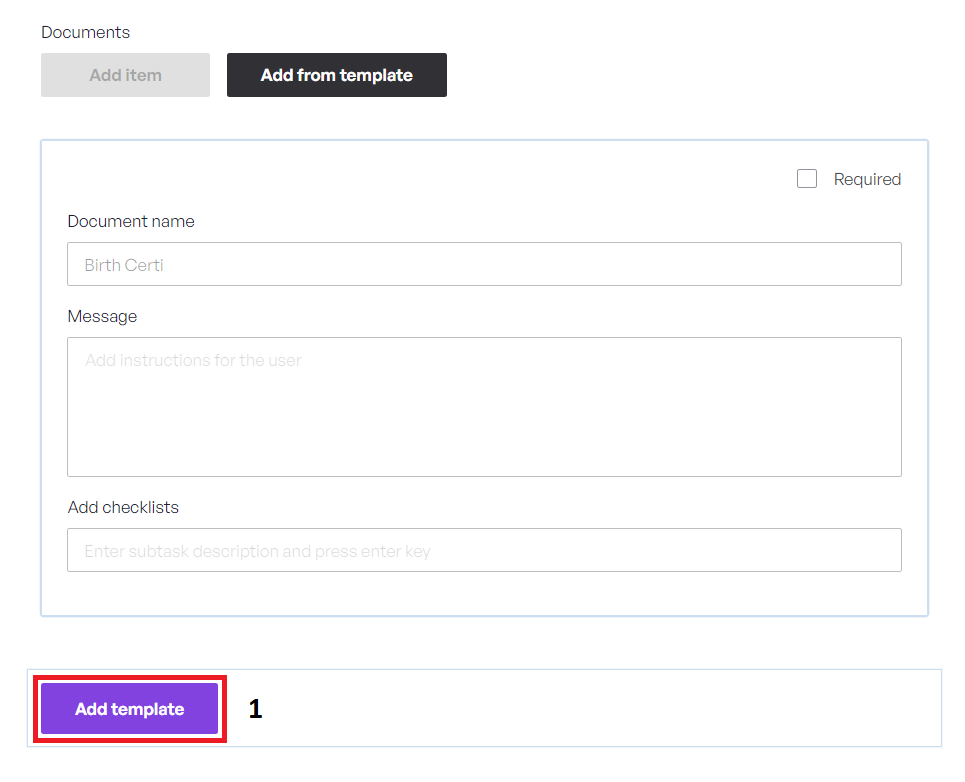
- Click the Add Template button, a template form is added into the request for easy customization and submission